The Best Doorway and Home Pull-Up Bars for Rock-Solid Strength at Home
Everyone has a story about a wobbly doorway bar: a creak from the trim, a little slip mid-rep, a scuff you try to buff out later. The right bar changes all that—turning a frame, wall, or ceiling into a secure training station that you actually trust. This roundup brings together robust, high-capacity options for home, garage, and apartment settings, with clear guidance on when a door-frame solution makes sense and when you should step up to a drilled, permanent mount.
Why this category matters more than you think
Pull-ups are pound-for-pound one of the most efficient strength investments you can make. They train the back, biceps, forearms, and core without taking up much space. For busy home athletes, a properly installed bar makes micro-sessions realistic: 5–10 quick reps between calls or as a finisher at the end of a short workout.
But “any bar will do” is the fastest way to damage trim or, worse, fail under load. Your bodyweight is just the starting point—dynamic reps, kipping, negatives, and weighted pull-ups can multiply forces. Sturdiness and weight capacity aren’t luxuries; they’re the foundation for safety and long-term progress.
Doorway leverage bars vs. drilled-in mounts
- Doorway leverage bars (no drilling): These hook over the top molding and brace against the inner sides of a standard door frame. They’re fast to install and store, ideal for renters who can’t put holes in walls. Upside: zero permanent modification. Downsides: they rely on trim strength and geometry; they can mar paint or dent soft molding; and they often flex or walk during dynamic work. Most are best for strict reps in the center of the door opening, with limited width and neutral grip options.
- Drilled wall/ceiling mounts: These anchor into studs, joists, or steel beams with lag bolts or clamps. Upside: highest rigidity and capacity, wider hand positions, and headroom that lets you elevate above the bar without knees or shins meeting the doorway. Downsides: requires tools, accurate measuring, and a willingness to commit to a mounting location.
If you plan to train for years, use weighted reps, or share with multiple users, the safer bet is a permanent mount. If you’re renting or only need occasional strict pull-ups, a door-mounted unit can work—provided your trim and measurements are compatible.
How to measure your doorway for a secure fit
- Width and molding profile: Measure the inner width (jamb to jamb) and the top molding depth. Most leverage bars require a standard interior width (often ~24–36 inches) and enough lip at the top to hook securely. Fancy crown or shallow modern trim can be incompatible.
- Frame strength: Solid wood or well-anchored jambs fare better than hollow metal frames commonly used in offices. Weak or floating trim is a red flag.
- Clearance: Close the door and check headroom above the top of the frame. Many users catch their knees or shins when trying to clear the bar in a tight doorway. If you can’t fully extend from a dead hang without touching, consider a wall or ceiling mount.
- Protect the trim: Use protective pads or towels and test gradually. If the bar leaves impressions after a few reps, stop. Damage compounds over time. When in doubt, go drilled.
How to shop for a home pull-up bar (safely)
- Weight capacity and safety margin: Look for a working load that comfortably exceeds your heaviest use (bodyweight + added plates + dynamic force). A 1.5×–2× safety margin is a sensible target.
- Mounting method and structure: Verify stud spacing (commonly 16 or 24 inches on-center) for wall bars, joist orientation for ceiling bars, and flange width/thickness for I-beam mounts. Use a stud finder and drill pilot holes before installing lag bolts.
- Clearance and depth: Aim for 18–24 inches of bar-to-wall distance for natural kipping and toes-to-bar without heel strikes. Ceiling risers add vital headroom in basements or garages.
- Grip versatility: Straight bars are great for classic training; multi-grip frames add neutral and angled positions to reduce wrist/shoulder stress and expand your exercise library.
- Bar diameter and finish: A 28–32 mm diameter suits most hands. Textured or rubberized grips can help, but durability and cleanability matter—sweat and chalk eat through cheap coatings.
- Hardware quality and install clarity: High-grade bolts, well-machined brackets, and a clear manual are the difference between an afternoon project and a weeklong headache.
- Space and future-proofing: Consider add-ons like rings, bands, or a punching bag. If you plan to progress to muscle-ups or weighted reps, pick a bar and mounting method that can evolve with you.
Selection criteria we used in this guide:
- Structural integrity and realistic weight capacity under dynamic loads
- Secure mounting method with clear install steps
- Useful clearance and headroom for full range of motion
- Grip variety or compatibility with accessories
- Materials, weld quality, and finish durability
- Real-world fit for home and garage environments
1. FirstLaw Fitness 600 lb I-Beam Pull-Up Bar — For serious strength on steel

Price and availability are accurate as of 12/22/2025 03:45 pm GMT and are subject to change.
This is the heavy lifter’s answer to “will it hold?” If your space has an exposed steel I-beam—common in basements and garages—this bar turns it into a commercial-grade station. The 600 lb rating isn’t just about static loads; it gives you a comfortable margin for dynamic sets, progressions to muscle-ups, and shared use by multiple athletes.
The bent ends help with natural wrist alignment, while rubber grips add friction and comfort. The tradeoff is specificity: you need a compatible beam and careful installation. That makes it overkill for apartments or basic doorway setups, but unbeatable for long-term home gyms built around structural stability.
2. XMARK Commercial Wall-Mounted Multi-Grip Pull-Up Bar — Grip variety meets gym-grade rigidity

Price and availability are accurate as of 12/22/2025 03:45 pm GMT and are subject to change.
XMARK’s multi-grip frame brings a gym-like experience home. Multiple handle angles reduce wrist and shoulder strain, letting you target different back regions without changing equipment. Anchored into studs, it resists sway, making it suitable for tempo work, negatives, and even controlled kipping when properly installed.
Installation is a project: you’ll need a stud finder, level, and lag bolts. The result is worth it if you’re building a permanent station. Compared with over-the-door options, you gain headroom and durable stability, losing only the ability to quickly stow it away.
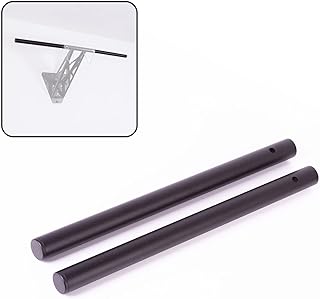
3. PULLUP & DIP Straight Pull-Up Bar Extension — Smart upgrade for mobile systems
Price and availability are accurate as of 12/22/2025 03:45 pm GMT and are subject to change.
This straight-bar extension is a clever accessory for owners of Pullup & Dip’s mobile bars. If you’re bumping into the limitations of a compact door or outdoor mount, the extension gives you more bar real estate for wide pulls, strict muscle-up transitions, and ring or band attachments.
Since it relies on the underlying Pullup & Dip base for structure, think of this as a capability booster rather than a solution on its own. If you train in parks or move between door and outdoor posts, it’s a small add that opens bigger movements—without committing to a permanent wall or ceiling mount.
Doorway measurement and trim protection: a quick checklist
- Confirm compatibility: Measure the inner width of your doorway and the depth of the top trim lip. Many leverage bars need a defined molding to hook securely; flush metal frames are often incompatible.
- Test the fit before loading: Dry-fit the bar, press down by hand, and slowly add bodyweight with a foot on the floor. If the bar shifts, creaks, or compresses soft trim, stop.
- Protect the finish: Use dense rubber pads (not just a towel) at contact points. Check trim after the first week—any indentation or paint cracking means it’s time to change approach.
- Know when to upgrade: If you can’t clear your chin without tucking your knees, or your doorway geometry is marginal, move to a drilled wall/ceiling mount for safety and comfort.
Safety and installation essentials
- Always anchor into structure: For walls, find and mark studs with an electronic stud finder. For ceilings, locate joists and confirm direction and spacing. For steel beams, verify clamp or bracket compatibility with the flange.
- Pre-drill and level: Drill pilot holes and use a level to prevent racking. Uneven mounting increases stress on fasteners and can induce flex or creaks.
- Use proper hardware: High-quality lag bolts and washers matter. If included hardware is soft or undersized, upgrade locally.
- Respect dynamic loads: Kipping, negatives, and weighted reps amplify forces. Choose a bar with margin and build up gradually as your setup proves itself.
- Periodic inspection: Recheck bolt torque and pads monthly. Small loosening over time is normal; staying ahead of it is part of safe ownership.
FAQ
Q: Can a doorway pull-up bar damage my trim or door frame?
A: Yes, especially on soft pine trim, shallow molding, or frames not tied solidly to studs. Use protective pads, test gradually, and inspect regularly. If you see compression or paint cracking, switch to a drilled wall or ceiling mount.
Q: What ceiling height do I need for comfortable pull-ups?
A: Aim for enough height to hang at full elbow extension with knees slightly bent and still clear your chin comfortably over the bar. In most homes, a ceiling-mounted bar with risers makes this possible even with standard 8-foot ceilings.
Q: How do I know if my wall studs are strong enough?
A: Standard 2×4 studs spaced 16 inches on-center are typically sufficient for a properly designed bar with quality lag bolts. Avoid mounting into drywall alone. If your studs are metal or spacing is non-standard, consult a contractor.
Q: Can I do kipping pull-ups on a home pull-up bar?
A: Only if the bar is securely anchored into structure and rated with ample margin. Many doorway leverage bars aren’t suitable for kipping. Wall and ceiling mounts with adequate clearance—installed correctly—are safer for dynamic movements.
Q: What bar diameter is best for most users?
A: Around 28–32 mm suits most hand sizes. Thicker bars challenge grip more but can fatigue forearms quickly. If you plan to use bands or rings, a standard straight bar diameter works well with common attachments.
The Final Rep: Matching Bars to Your Space and Goals
If you’re committed to long-term, versatile training and have access to structure:
- Choose the FirstLaw Fitness I-Beam Pull-Up Bar when you have an exposed steel beam and want maximum rigidity and capacity.
- Pick the XMARK Commercial Multi-Grip Bar if joint-friendly hand positions and gym-like versatility are top priorities.
- Go with the Ultimate Body Press 48″ Bar when you need the flexibility to mount on wall or ceiling, plus risers for real headroom.
- Opt for the Titan Fitness 52″ Adjustable-Depth Bar if your space demands clearance adjustments and you want a straightforward, strong straight bar.
If you’re working with a compact room or want multifunction:
- The Kipika 32″ Ceiling Bar organizes your ceiling space and adds mounts for bags and bands, ideal for efficient small gyms.
If you already own a mobile Pullup & Dip setup:
- The Straight Pull-Up Bar Extension expands your movement options without rebuilding your space.
Bottom line: start with structure and safety, not convenience. Measure carefully, choose a bar whose capacity comfortably exceeds your heaviest planned use, and install into real framing with quality hardware. Whether you’re sneaking in sets between meetings or chasing a weighted pull-up PR, the right bar turns your home into a reliable training ground you’ll trust—and actually use—every week.


Leave a Comment